Loading... Please wait...
 Categories
Categories
- Home
- KITS
- BEAD WEAVING
- GWYNIAN ROPES BRACELET INSTRUCTIONS DOWNLOAD, (1 unit)
GWYNIAN ROPES BRACELET INSTRUCTIONS DOWNLOAD, (1 unit)
")
, $9.99 (https://landofodds.com/gwynian-ropes-bracelet-instructions-download-1-unit/))

Product Description
GWYNIAN ROPES BRACELET
Designed by: Warren Feld
BW3-RAW-01
INTERMEDIATE/ADVANCED LEVEL
-- Bead Weaving Sequence
-- Lesson: Right Angle Weave, Shapes, Negative Spaces
-- Bracelet

A cacophony of shapes interwoven within both orderly and chaotic planes and ropes. Play with fanciful right angle weave combinations of super duos, long magatamas, peanuts, mini drops, crystals and seed beads.
NOTE: Regular retail and wholesale store discounts do not apply to kits.
GWYNIAN ROPES BRACELET KIT
Instructions to make a 7 - 7 1/4" bracelet
Supplies to make up to an 8 - 8 1/4" bracelet
|
PLEASE NOTE: Sometimes, because of erratic supplies of beads and othermaterials,
we will need to substitute something of similar color and quality.
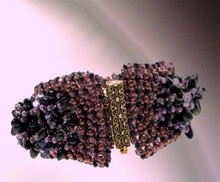
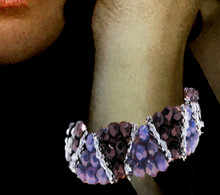
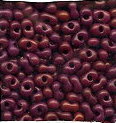
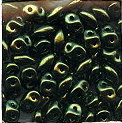
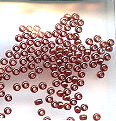
#1a and 1b WINE (Crystal Foundation) and DARK PURPLE (Glass Foundation)
| |||||||||||||||||||||||||||||||||||||||||||
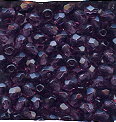


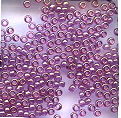

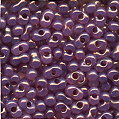


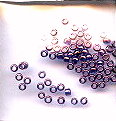
Colors may appear differently on different monitors.
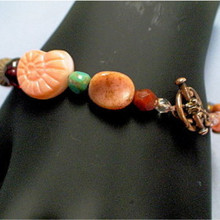
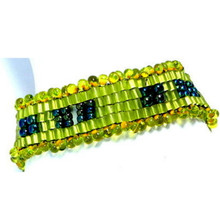
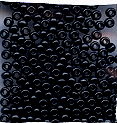
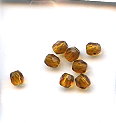
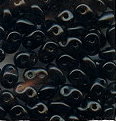
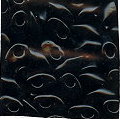
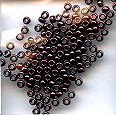
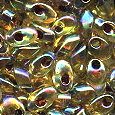
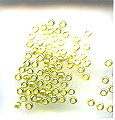
#2a and 2b: COPPER LIME (Crystal Foundation) and CELSIAN (Glass Foundation)
|
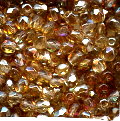
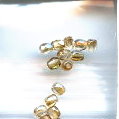


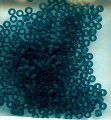
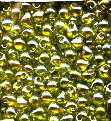


Colors may appear differently on different monitors.
FORMAT OPTONS
(1) KIT with Instructions on CD
(2) CD Instructions Only
About the Kit...
The GWYNIAN ROPES BRACELET contrasts and balances order and chaos, regimentation and freedom, flatness and dimensionality, tight arrangement and playful disorder.
I was inspired by the fantasy world's arrangement of gods with opposing forces. Those serving these gods were called the priests of Gwynneth. They teach how to recognize and manage the duality and oppositon of chaos and order.
The GWYNIAN ROPES BRACELET is made from either Austrian Crystal or Czech fire polish glass beads, and additional Austrian crystal, Japanese drop, peanut, long magatama, and seed beads, as well as Czech superduo two-holed beads. This bead woven piece has a modified right-angle weave stitched foundation of Austrian crystal beads.
The Runway Base has three framed open (also called "negative") spaces, through each of which are twist-braided 3 Gwynian Ropes. For the base, I modified the right angle stitch pattern, so that I could add a diagonal embellishment across the center hole of each unit, and that I could also force the 4 corners of the unit to be (and stay) squared. The base is slightly concaved. The outer edge lines of the base are deliberately made not to follow a perfectly straight line.
The ropes are woven using a modified dimensional right angle weave pattern. A push-pull clasp is sewn onto either end of the piece.
The strategic placement of peanut beads allows a "locking" or "stiffness" to the sections they are used in, which I found to be a tremendous help.
My goal here was to see if I could use several new shapes of seed beads -- peanuts (like a barbell), long magatamas (a type of drop with asymmetrical shape), 2.8mm mini drops (teardrop), and super-duos (a 2-hole flat oval) to do something that had a lot of dimensionality to it. Too often, when designers use these beads, their compositions are very flat, because of limitations they confront due to the directional nature of the holes in these beads. The holes don't lend themselves to "changing direction", so to speak, as an elbow-shaped or twisted-shape pipe might allow you to do. I wanted to force the beads and the composition to change direction.
As with all my projects, I like to infuse the designs with aspects of contemporary design goals. In this project, I set out to accomplish four contemporary design goals, including:
- Dimensionality: We don’t want our pieces to be flat and one-dimensional, nor do we want our efforts to achieve a greater dimensionality to overwhelm the piece.
- Interplanar Space: We want to build in subtle violations of “straight lines” and “flat planes”, without detracting from the overall aesthetic.
- Control over interplay of light and shadow: We want the components of the piece, as well as the piece as a whole, to always excite with unexpected reflections and refractions of light and shadow. The piece should never feel like a static photograph.
- Infuse an intellectual tension: We want this piece in particular to show a successful control over that which is “chaotic” and that which is “orderly”.
In the Gwynian Ropes Bracelet project...
What You Will Learn:
| What You Will Learn:
|
This set of instructions is organized as a series of Jewelry Design Choices:
SUPPLIES LIST, p. 3
I. Planning Your Project, p.5
SHAPES, p.6
POSITIVE AND NEGATIVE SPACES, p. 7
DIMENSION, FORM, MOVEMENT, LINE, p.7
SUPPORT SYSTEMS, p.8
IA. Conceptualizing Your Piece, p.8
IB. Measurements, p. 10
IC. Selecting Materials, p. 12
ID. Sketching a Pattern or Graph, p. 13
IE. Identifying Potential Areas of Weakness within Your Piece, p. 14
IF. Identifying How To Attach The Clasp, p.14
IG. Visualizing Your Process, p. 14
IH. Organizing Your Work Space, p.16
II. Beginning Your Project, p.17
IIA. Basic Steps, p.17
1. The Runway Framework Base, p.18
1a. The Basic Right Angle Weave Unit and Pathway, including embellishment, p.19
1b. Making First U-Frame, p. 22
2. Gwynian Ropes, p. 31
2a. Making the Gwynian Ropes: The Basic Right Angle Weave Unit and Pathway, p. 34
2b. Anchoring Each Rope Back Into The Runway Framework, p.40
3. Attaching the Clasp, p.43
4. Final Edging With 15/0 Seed Beads, p.44
IIB. Dealing with Contingencies, p.45
IIC. Finishing Touches, p.45
III. Summary of Learning Objectives You Have Met
After Accomplishing This Project, p. 46
IV. Next Steps p.49
IVA. Suggested Readings, p.49
<td valign="
| LEARNING OBJECTIVES | RIGHT ANGLE WEAVE | ||
|
| BEGINNER | INTERMEDIATE | ADVANCED |
| TECHNICAL MECHANICS | |||
| 1. Managing Thread Tension |
| INTERMEDIATE |
|
| 2. Holding Your Piece To Work It | INTERMEDIATE |
| |
| 3. Reading Simple Pattern, Figure and/or Graph |
| INTERMEDIATE |
|
| 4. Selecting Materials |
| ADVANCED | |
| 5. Identifying Areas of Potential Weakness, and | BEGINNER |
|
|
| 6. Determining Measurements, including Width and Length of a Piece, Especially In Relationship To Bead Sizes |
| INTERMEDIATE |
|
| 7. Finishing Off Threads in Piece or Extending by Adding Threads | BEGINNER |
|
|
|
| |||
|
| |||
| UNDERSTANDING CRAFT BASIS OF STITCH | |||
| 1. Starting the Stitch | INTERMEDIATE |
| |
| 2. Implementing the Basic Stitch |
| ADVANCED | |
| 3. Finishing Off Your Piece With A Clasp Assembly | INTERMEDIATE |
| |
| 4. Creating Simple Surface Embellishment |
| INTERMEDIATE |
|
| 5. Creating a Simple Edging or Fringe |
| INTERMEDIATE |
|
| 6. Working Stitch in Flat Form | INTERMEDIATE |
| |
| 7. Increasing and Decreasing |
|
|
|
| 8. Working Stitch in Tubular Form |
| ADVANCED | |
| 9. Working Stitch To Create Open (Negative Spaces), and Split Forms |
| INTERMEDIATE |
|
| 1
| |||