Loading... Please wait...
 Categories
Categories
COBBLESTONES BRACELET INSTRUCTIONS DOWNLOAD (1 unit)

, $9.99 (https://landofodds.com/cobblestones-bracelet-instructions-download-1-unit/))

Product Description
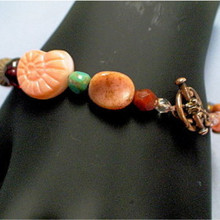
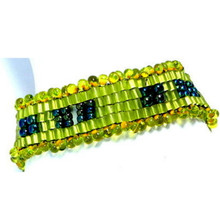
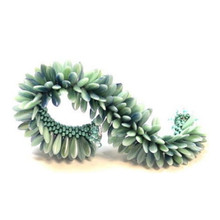
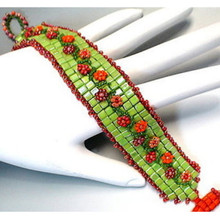
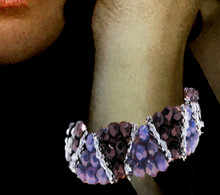
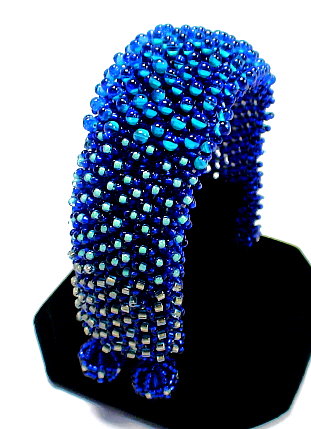
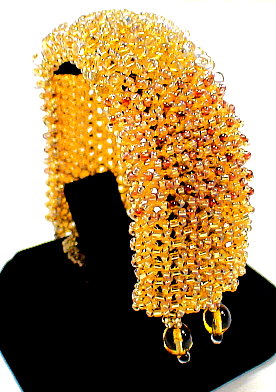
Cobblestones Bracelet
Designer: Kathleen Lynam
BW1-SOM-02
BEGINNER LEVEL
-- Bead Weaving Sequence
-- Stitch of the Month
-- Lesson: Netting
-- Bracelet
The pavement glistens with drops! Dripping with texture, this bracelet begins with a netted base and is embellished with drops and seed beads.
NOTE: Regular retail and wholesale store discounts do not apply to kits.
The COBBLESTONES BRACELET KIT
Instructions to make a 7" bracelet
Supplies to make up to an 8" bracelet
|
PLEASE NOTE: Sometimes, because of erratic supplies of beads and othermaterials,
we will need to substitute something of similar color and quality.
#1 AQUA / SEAFOAM /CAPRI PALETTE (KITS IN THIS PALETTE HAVE BEEN RETIRED)
|
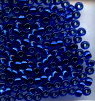


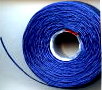
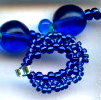
Colors may appear differently on different monitors.
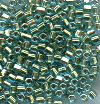
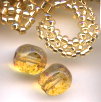
#2 GOLDEN WITH LIGHT AMETHYST LUSTER PALETTE
|

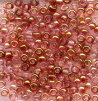
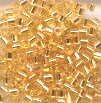

Colors may appear differently on different monitors.
FORMAT OPTONS
(1) Instructions Digital Download
About the Kit...
In some sense, all bead-weaving is "netting." Here we narrow the concept to stitching where you have an odd number of beads on loops, and these are interconnected (thus shared) at the center point on each netted loop. The first row joins to the next through these shared beads.
The Netting stitch is very versatile. It works up relatively quickly. It can be worked flat, tubular,circular. It can be used to create coverings for objects. It can be used successfully to cover beads of all sizes for both bracelets and necklaces. Netted collars are beautiful pieces of jewelry as well as works of art. Practically speaking, simple netted necklaces and bracelets, with or without embellishment, have the mostwearability.
Netting creates open (what we sometimes refer to as "negative") spaces. This offers the jewelry designer many possibilities not easily achieved with other types of bead-weaving. It allows the underlying surface to become part of the composition. This suggests texture and dimensionality. It allows a movement and drapery, relative to the wearer's body, or any 3-dimensional shape, for that matter, that is very natural, soft and flowing.
In the Cobblestones Bracelet project...
LearnToBead Goals:
- History of Netting
- Netting bead weaving basics
- Managing Thread Tension
- Reading a Pattern/Creating a simple Figural Representation
- Increasing and Decreasing with Netting
- Embellishing above your netting base
- Finishing off the edges
- Making a bead woven, Netting style toggle clasp
- Discussion of when Netting works well
Instructions Contents:
This set of instructions is organized as a series of
Jewelry Design Choices:
I. Planning Your Project
IA. Conceptualizing Your Piece
IB. Measurements
IC. Selecting Materials
ID. Sketching a Pattern or Graph
IE. Identifying Potential Areas of Weakness within Your Piece
IF. Visualizing Your Process
IG. Organizing Your Work Space
II. Begining Your Project
IIA. Basic Steps
1) Base Rows
2) Embellished Surface Rows
3) Making The Toggle Clasp
IIB. Dealing with Contingencies
IIC. Finishing Touches
III. Summary of Learning Objectives You Have Met
After Accomplishing This Project
IV. Next Steps
IVA. Suggested Readings
This bracelet involves creating a netted base, and then adding a second layer of netting as embellishment. I envisioned a bracelet with a lot of textural and color variation embellishment on the surface, to give the feel of a cobblestone walkway. Since I wanted the clasp to look like it was an organic extension of my cobblestone walkway, I decided to make the clasp, in part, using the Netting Stitch. The Netted bracelet is very fluid, and easy to wear. It is a casual piece.
| LEARNING OBJECTIVES | STITCH OF THE MONTH NETTING STITCH COBBLESTONES BRACELET BW1-2-SOM-Netting |
||
| BEGINNER | INTERMEDIATE | ADVANCED | |
| TECHNICAL MECHANICS | |||
| 1. Managing Thread Tension | BEGINNER | ||
| 2. Holding Your Piece To Work It | BEGINNER | ||
| 3. Reading Simple Pattern, Figure and/or Graph | BEGINNER | ||
| 4. Selecting Materials | BEGINNER | ||
| 5. Identifying Areas of Potential Weakness, and Strategies for Dealing With These |
BEGINNER | ||
| 6. Determining Measurements, including Width and Length of a Piece, Especially In Relationship To Bead Sizes | BEGINNER | ||
| 7. Finishing Off Threads in Piece or Adding Threads | BEGINNER | ||
| UNDERSTANDING CRAFT BASIS OF STITCH | |||
| 1. Starting the Stitch | BEGINNER | ||
| 2. Implementing the Basic Stitch | BEGINNER | ||
| 3. Finishing Off Your Piece With A Clasp Assembly | BEGINNER | ||
| 4. Creating Simple Surface Embellishment | BEGINNER | ||
| 5. Increasing and Decreasing | |||
| 6. Working Stitch in Tubular Form | |||
| 7. Working Stitch To Create Open (Negative Spaces), and Split Forms | |||
| 8. Elaborately Embellishing the Stitch, including Fringes, Edge Treatments, Straps and Connectors | |||
| 9. Working Stitch in Circular Form | |||
| 10. Working Stitch in 3-Dimensions | |||
| UNDERSTANDING ART & DESIGN BASIS OF STITCH | |||
| 1. Learning Implications When Choosing Different Sizes/Shapes of Beads, or Using Different Stringing Materials | |||
| 2. Understanding Relationship of this Stitch in Comparision to Other Types of Bead Weaving Stitches | |||
| 3. Understanding How Bead Asserts Its Need For Color, Using This Stitch | |||
| 4. Creating Your Own Design with This Stitch, in Reference to Jewelry Design Principles of Composition | |||
| 5. Creating Shapes, Components and Forms with This Stitch, and Establishing Themes | |||
| BECOMING BEAD WEAVING ARTIST | |||
| 1. Developing A Personal Style | |||
| 2. Valuing or Pricing Your Work | |||
| 3. Teaching Others The Stitch | |||
By completing a purchase of any of our kits and/or instructions, you agree to our terms and conditions:
1. Customers are allowed to make 3 copies of instructions for personal use
2. Permission is required from LandOfOdds.com, Be Dazzled Beads, or LearnToBead.net, when teaching for fees, with any of our projects