Loading... Please wait...
 Categories
Categories
BY THE SEA BRACELET INSTRUCTIONS DOWNLOAD, (1 unit)

, $9.99 (https://landofodds.com/by-the-sea-bracelet-instructions-download-1-unit/))

Product Description
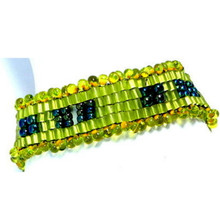
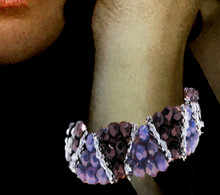
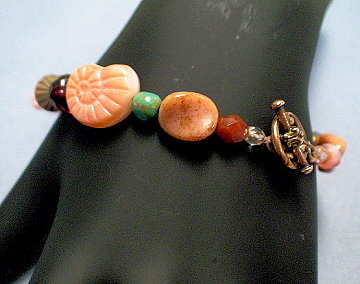
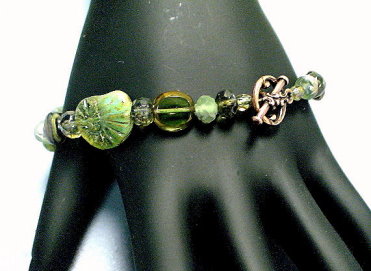
By The Sea Bracelet
Designer: Warren Feld
BS1.02
BEGINNER LEVEL
-- Bead Stringing Sequence
-- Lesson: Stringing with Needle and Thread
-- Bracelet
A remembrance of that beautiful day at the beach! Mementos picked up along the dunes and water's edge, strung on thread. Learn to Bead String using needle and thread.
NOTE: Regular retail and wholesale store discounts do not apply to kits.
The BY THE SEA BRACELET KIT
Instructions to make a 7 1/4" bracelet
Supplies to make up to an 8 1/4" bracelet
|
PLEASE NOTE: Sometimes, because of erratic supplies of beads and othermaterials,
we will need to substitute something of similar color and quality.
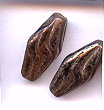
#1. CORAL PALETTE
|
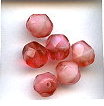
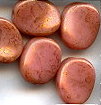
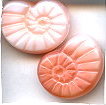
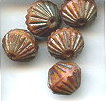

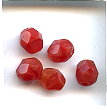
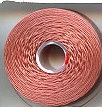

Colors may appear differently on different monitors.
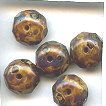
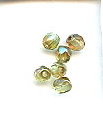
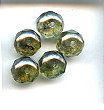
#2. LAVENDER PALETTE
|
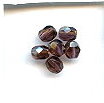
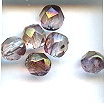


Colors may appear differently on different monitors.
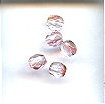
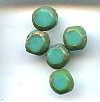
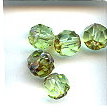
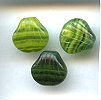
#3. SEA GREEN PALETTE
|
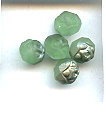

Colors may appear differently on different monitors.
FORMAT OPTONS
(1) Instructions on Digital Download
About the Kit...
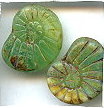
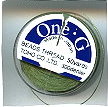
This bracelet is made up of some unusual Czech Glass beads, including nautilus shape, Picasso Twist Bean, fire polish belly donut, and fire polish round beads, fire polish fluted beads and triangle cathedral beads. These are strung on C-Lon nylon beading thread, size D, in a color matching the predominant color of our beads. In this piece, we use a Toggle Clasp, the finish of which, is also coordinated with the beads. The clasp is secured by tying knots.
This single-strand bracelet is designed for a Woman and is 7 1/4" long. It is designed to fit comfortably around the wrist.
The holes of our beads, while sharp, should not pose a risk for a waxed beading thread.
I chose a Toggle Clasp because it has great functional properties, no moving parts, adds a lot of jointedness or support to the piece, is easy to use, and visually complements the overall design. The Toggle Clasp itself is a great support system.
With a Toggle Clasp, you need to be able to pull through the ring both the bar and the first one or two beads near the bar on your strand. I have made sure that the beads next to the bar are small enough to allow this to happen easily.
In this bracelet, we begin by tying off one side of our clasp to the thread, using three knots. We then go back and forth through our beads three times, tying 3 more knots at each end, before proceeding to the next pass.
While I often try to make my pieces adjustable in length, for this project, I am not doing this.
This bracelet is casual.
The instructions also discuss in detail how to select clasps, the pros and cons of various clasps and stringing materials, and the use of "support systems" in jewelry design.
In the By The Sea Bracelet project...
LearnToBeadGoals:
- Selecting Beading Thread, Beading Needles, and Beading Wax
- The basic steps of using needle and thread in bead stringing
- Understanding the color effects of thread
- Selecting a clasp and attaching a clasp to your bead work
- Understanding "clasp assemblies" and "support systems"
- Using a bead board and sizing cone
- Choices to be made, when laying out your beads in a pattern
- Relationship of needle/thread method to cable wire method
Table of Contents
SUPPLIES LIST
I. Planning Your Project
Choosing Clasps and Clasp Assemblies and Support Systems
Choosing Stringing Materials
IA. Conceptualizing Your Piece
IB. Measurements
IC. Selecting Materials
ID. Sketching a Pattern or Graph
IE. Identifying Potential Areas of Weakness within Your Piece
IF. Visualizing Your Process
IG. Organizing Your Work Space
II. Beginning Your Project
IIA. Basic Steps
- How to Use Needle and Thread
- Beading Threads vs. Bead Cords
- Color Effects of Thread
- Needles
- Getting Your Thread Onto Your Needle
- Wax, Wax, Wax
- Hiding The Knots
- Doubling Your Thread
- Adding Thread
Let’s Make Our Bracelet
IIB. Dealing with Contingencies
IIC. Finishing Touches
III. Summary of Learning Objectives You Have Met
After Accomplishing This Project
IV. Next Steps
IVA. Suggested Readings
IVB. Next Lessons
| LEARNING OBJECTIVES | BEAD STRINGING NEEDLE & THREAD BY THE SEA BRACELET BS1.02-Needle & Thread | ||
| BEGINNER | INTERMEDIATE | ADVANCED | |
| TECHNICAL MECHANICS | |||
| 1. Holding Your Piece To Work It | BEGINNER | ||
| 2. Reading Simple Pattern, Figure and/or Graph; Diagramming | BEGINNER | ||
| 3. Selecting Stringing Materials | BEGINNER | ||
| 4. Selecting Clasps and other Jewelry Findings | BEGINNER | ||
| 5. Selecting Beads and other Components | BEGINNER | ||
| 6. Laying Out Your Piece | BEGINNER | ||
| 7. Identifying Areas of Potential Weakness, and Strategies for Dealing With These | BEGINNER | ||
| 8. Selecting and Using Adhesives | |||
| 9. Use of Tools and Equipment | BEGINNER | ||
| 10. Determining Measurements and Ease, including Width and Length of a Piece, Especially In Relationship To Bead Sizes | BEGINNER | ||
| 11. Finishing Off Threads, Cable Wires or Other Stringing Materials in Piece or Adding Threads/Cable Wires/Stringing Materials | BEGINNER | ||
| UNDERSTANDING CRAFT BASIS OF STRINGING METHODS | |||
| 1. Starting the Piece | BEGINNER | ||
| 2. Implementing the Basic Method | BEGINNER | ||
| 3. Finishing Off Your Piece With A Clasp Assembly | BEGINNER | ||
| 4. Managing String/Cord/Thread/Wire Tension | BEGINNER | ||
| 5. Crimping | |||
| 6. Needle/Thread Work | BEGINNER | ||
| 7. Pearl Knotting and Putting Knots Between Beads | |||
| 8. Making Simple and Coiled Loops Using Hard Wire | |||
| 9. Making and Using Connectors; Segmenting; Directional Control | |||
| 10. Adding Dangles and Embellishments | |||
| 11. Making Multi-Strands Piece | |||
| 12. Making Twist-Strands Piece | |||
| UNDERSTANDING ART & DESIGN BASIS OF BEAD STRINGING | |||
| 1. Learning Implications When Choosing Different Sizes/Shapes of Beads, or Using Different Stringing Materials | BEGINNER | ||
| 2. Learning Implications When Choosing Different Kinds of Clasps, or Using Different Jewelry Findings and Components | BEGINNER | ||
| 3. Understanding Relationship of this Bead Stringing Method in Comparision to Other Types of Bead Stringing Methods | BEGINNER | ||
| 4. Creating Support Systems Within Your Piece In Anticipation of Effects of Movement | BEGINNER | ||
| 5. Understanding How Bead Asserts Its Need For Color When Stringing Beads | BEGINNER | ||
| 6. Creating Your Own Design with This Bead Stringing Method, in Reference to Jewelry Design Principles of Composition | |||
| 7. Creating Shapes, Components and Forms To Use With This Bead Stringing Method, and Establishing Themes | |||
| BECOMING BEAD STRINGING ARTIST & DESIGNER | |||
| 1. Developing A Personal Style | |||
| 2. Valuing or Pricing Your Work | |||
| 3. Teaching Others Bead Stringing Methods | |||
| 4. Promoting Yourself and Your Work | |||
By completing a purchase of any of our kits and/or instructions, you agree to our terms and conditions:
1. Customers are allowed to make 3 copies of instructions for personal use
2. Permission is required from LandOfOdds.com, Be Dazzled Beads, or LearnToBead.net, when teaching for fees, with any of our projects