Loading... Please wait...
 Categories
Categories
DRAGON BACK BRACELET INSTRUCTIONS DOWNLOAD, (1 unit)

, $9.99 (https://landofodds.com/dragon-back-bracelet-instructions-download-1-unit/))

Product Description
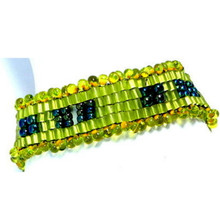
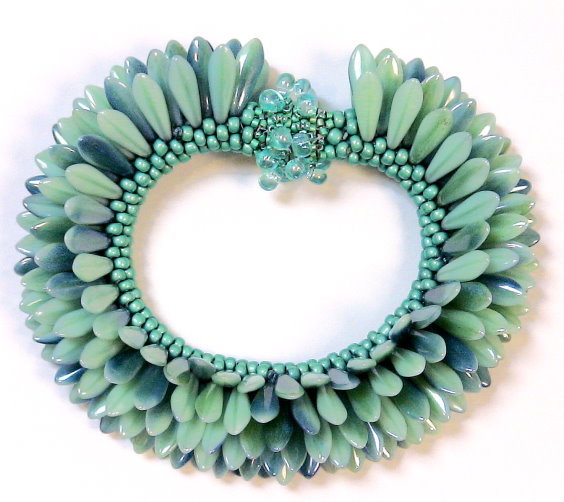
Dragon Back Bracelet
Designer: Kathleen Lynam
BW2-CRO-01
INTERMEDIATE LEVEL
-- Bead Weaving Sequence
-- Lesson: Bead Crochet
-- Bracelet
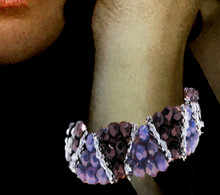
Daggers are for wearing! Bead crochet a stunning two-sided bracelet – one side using size 8/0 seed beads and the other all glass daggers.
NOTE: Regular retail and wholesale store discounts do not apply to kits.
The DRAGON BACK BRACELET KIT
Instructions to make a bracelet to fit a 6 1/2" - 7" wrist
Supplies to make a bracelet to fit up to an 8" wrist
|
PLEASE NOTE: Sometimes, because of erratic supplies of beads and othermaterials,
we will need to substitute something of similar color and quality.
#1 TURQUOISE LUSTER
|


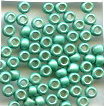


Colors may appear differently on different monitors.
FORMAT OPTONS
(1) Instructions Digital Download
About the Kit...
I have made a lot of crochet ropes using different sizes of seed beads. I was wondering what would happening if I used a different shape and size of bead -- especially in terms of wearability. Judith Bertoglio-Giffin who has written extensively on "bead crochet" has a pattern for a reversible crochet bracelet. I adapted this pattern as the solution, both to using different shapes, as well as preserving wearability.
This project is for artists who have some experience with bead crochet, but want to take it a bit further.
II had seen some creative use of dagger beads in ropes done with crochet or peyote or other stitches. I liked the drama. The resulting texture was very appealling. But time after time, I found that many of these designs did not sit well on the wrist. Often, the daggers would not sit straight up, but would slump or spread out from each other, diminishing the effect of tightly arranged daggers pointing upwards. So, too, these bracelets would turn around on the wrist, the rows of daggers pushing sideways or twisting.
I came across a pattern for a reversible bead crochet rope by Judith Bertoglio-Giffin. The design allowed one color to remain positioned facing the wrist, and the other color facing outward. I wondered what would happen if I incorporated the dagger beads in this 3-3-3-4 pattern. This worked.
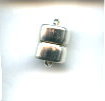
Another dilemma I wanted to confront in this project, is how to attach the two ends together. In the Introductory class in this series, we make a bead crochet rope and slip on a beaded bead to hide the normally messy attached ends.[There is another technique to attach both ends with an invisible join, and I save this technique for another project.] In this class, I wanted to attach a clasp assembly, to each end, and disguise this clasp assembly as a beaded bead. This meant starting the rope using a ladder stitch. The ladder gives us something to anchor the clasp onto.
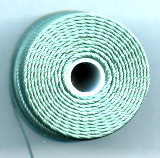
In our Dragon Back Bracelet, we make a rope, 6 size 8/0 beads around, bead-crocheted on Tex 135 C-Lon bead cord. We create brick stitched caps to cover each side of our magnetic clasp, and we attach these covered clasp parts to either side of our rope.
Bead Crochet uses a "slip-stitch", moreso than a specific "crochet-stitch." Success depends as much on your ability to manage the stitching and all the parts, using both hands, as it does on mastering the basic technique.
In the Dragon Back Bracelet project...
LearnToBead Goals:
- Using a crochet bead pattern with different bead shapes and sizes
- Implementing a reversible bead crochet pattern which allows for easy wearability
- How to add more beads, after you have begun your rope
- Discussion of two approaches for starting and ending a bead crochet rope
- Making bead woven, brick stitched caps to cover a magnetic clasp
- Attaching a bead woven, brick-stitched clasp assembly, which functions, in appearance, as a beaded bead
TABLE OF CONTENTS
SUPPLIES LIST, p. 3
I. Planning Your Project , p. 4
IA. Conceptualizing Your Piece, p. 5
IB. Measurements, p. 6
IC. Selecting Materials, p. 7
ID. Sketching a Pattern or Graph, p. 7
IE. Identifying Potential Areas of Weakness within Your Piece, p. 8
IF. Visualizing Your Process, p. 8
IG. Organizing Your Work Space, p. 10
II. Begining Your Project, p. 10
IIA. Basic Steps, p. 10
A1. BEAD CROCHET ROPE, p. 11
A1(1). Preparation, p. 11
A1(2). Row 1 Ladder, p. 12
A1(3). Row 2 Convert Ladder Row to Slip-Stitch Row, p. 13
A1(4). Subsequent Rows to end, p. 15
A2. CLASP ASSEMBLY, p. 16
A3. ATTACHING CLASP ASSEMBLY, p. 22
IIB. Dealing with Contingencies, p. 23
IIC. Finishing Touches, p. 24
III. Summary of Learning Objectives You Have Met
After Accomplishing This Project, p. 25
IV. Next Steps, p. 26
IVA. Suggested Readings , p. 26
This project is for artists who have some experience with bead crochet, but want to take it a bit further. I had seen some creative use of dagger beads in ropes done with crochet or peyote or other stitches. I liked the drama. The resulting texture was very appealling. But time after time, I found that many of these designs did not sit well on the wrist. Often, the daggers would not sit straight up, but would slump or spread out from each other, diminishing the effect of tightly arranged daggers pointing upwards. So, too, these bracelets would turn around on the wrist, the rows of daggers pushing sideways or twisting. I came across a pattern for a reversible bead crochet rope by Judith Bertoglio-Giffin. The design allowed one color to remain positioned facing the wrist, and the other color facing outward. I wondered what would happen if I incorporated the dagger beads in this 3-3-3-4 pattern. This worked.
Another dilemma I wanted to confront in this project, is how to attach the two ends together. In the Introductory class in this series, we make a bead crochet rope and slip on a beaded bead to hide the normally messy attached ends.[There is another technique to attach both ends with an invisible join, and I save this technique for another project.] In this class, I wanted to attach a clasp assembly, to each end, and disguise this clasp assembly as a beaded bead. This meant starting the rope using a ladder stitch. The ladder gives us something to anchor the clasp onto. In our Dragon Back Bracelet, we make a rope, 6 size 8/0 beads around, bead-crocheted on Tex 135 C-Lon bead cord. We create brick stitched caps to cover each side of our magnetic clasp, and we attach these covered clasp parts to either side of our rope.Bead Crochet uses a "slip-stitch", moreso than a specific "crochet-stitch." Success depends as much on your ability to manage the stitching and all the parts, using both hands, as it does on mastering the basic technique.
| LEARNING OBJECTIVES | DRAGON BACK BRACELET BW2-CRO-01 | ||
| BEGINNER | INTERMEDIATE | ADVANCED | |
| TECHNICAL MECHANICS | |||
| 1. Managing Thread Tension | BEGINNER | ||
| 2. Holding Your Piece To Work It | BEGINNER | ||
| 3. Reading Simple Pattern, Figure and/or Graph | INTERMEDIATE | ||
| 4. Selecting Materials | INTERMEDIATE | ||
| 5. Identifying Areas of Potential Weakness, and Strategies for Dealing With These | INTERMEDIATE | ||
| 6. Determining Measurements, including Width and Length of a Piece, Especially In Relationship To Bead Sizes | BEGINNER | ||
| 7. Finishing Off Threads in Piece or Adding Threads | BEGINNER | ||
| UNDERSTANDING CRAFT BASIS OF STITCH | |||
| 1. Starting the Stitch | INTERMEDIATE | ||
| 2. Implementing the Basic Stitch | INTERMEDIATE | ||
| 3. Finishing Off Your Piece With A Clasp Assembly | INTERMEDIATE | ||
| 4. Creating Simple Surface Embellishment | BEGINNER | ||
| 5. Increasing and Decreasing | BEGINNER | ||
| 6. Working Stitch in Tubular Form | INTERMEDIATE | ||
| 7. Working Stitch To Create Open (Negative Spaces), and Split Forms | |||
| 8. Elaborately Embellishing the Stitch, including Fringes, Edge Treatments, Straps and Connectors | |||
| 9. Working Stitch in Circular Form | |||
| 10. Working Stitch in 3-Dimensions | |||
| UNDERSTANDING ART & DESIGN BASIS OF STITCH | |||
| 1. Learning Implications When Choosing Different Sizes/Shapes of Beads, or Using Different Stringing Materials | INTERMEDIATE | ||
| 2. Understanding Relationship of this Stitch in Comparision to Other Types of Bead Weaving Stitches | INTERMEDIATE | ||
| 3. Understanding How Bead Asserts Its Need For Color, Using This Stitch | BEGINNER | ||
| 4. Creating Your Own Design with This Stitch, in Reference to Jewelry Design Principles of Composition | |||
| 5. Creating Shapes, Components and Forms with This Stitch, and Establishing Themes | INTERMEDIATE | ||
| BECOMING BEAD WEAVING ARTIST | |||
| 1. Developing A Personal Style | |||
| 2. Valuing or Pricing Your Work | |||
| 3. Teaching Others The Stitch | |||
By completing a purchase of any of our kits and/or instructions, you agree to our terms and conditions:
1. Customers are allowed to make 3 copies of instructions for personal use
2. Permission is required from LandOfOdds.com, Be Dazzled Beads, or LearnToBead.net, when teaching for fees, with any of our projects