Categories
Categories
BEZELWORKS PENDANT INSTRUCTIONS DOWNLOAD (1 unit)
Product Description
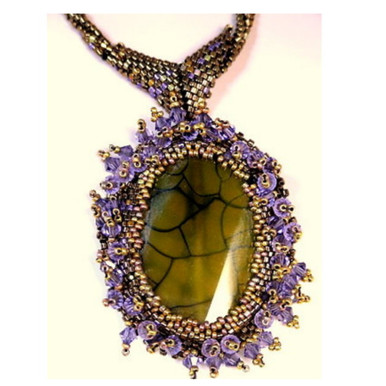
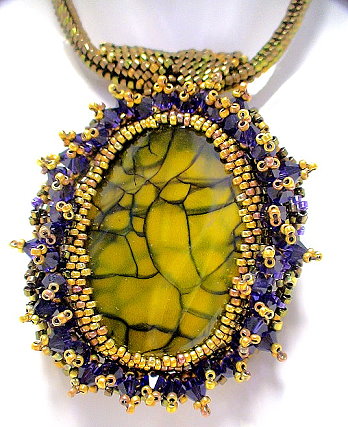
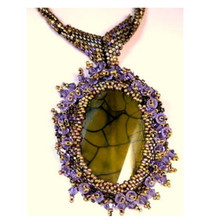
BezelWorks Pendant
Designer: Warren Feld
BW3-PEY-01 (also JD4.FORMFUNCTION.2)
ADVANCED LEVEL
-- Bead Weaving Sequence
-- Lesson: Tubular Peyote, Circular Peyote, Open Back Peyote Bezel, Spiral Tube Ndebele, Fringe
-- Theory: Fringe, Edge, Strap, Surface Embellishment, Bail, Center Piece, Canvas, Line, Boundary, Frame
--Pendant and Strap
Wear that mystical, bead-bezeled stone close to your heart! Use tubular peyote, circular peyote, and spiral tube Ndebele stitches while exploring design ideas about fringe, edge, bail, surface embellishment and strap.
NOTE: Regular retail and wholesale store discounts do not apply to kits.
The BezelWorks Pendant w/Strap KIT
Instructions to make a 16 1/2 - 18 1/2" Pendant w/Necklace Strap
Supplies to make up to an 19" Pendant w/Strap
|
PLEASE NOTE: Sometimes, because of erratic supplies of beads and othermaterials,
we will need to substitute something of similar color and quality.
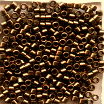
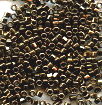
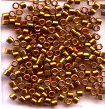
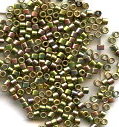
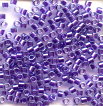
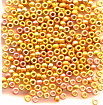
#1. OLIVE FIRE OPAL PALETTE
|
FORMAT OPTONS
(1) Instructions Digital Download
About the Kit...
If jewelry is "art", is the entire piece the art, or only the center piece, or central focal part the art? Classical art theory holds that the fringe, strap, edging, bail, and other similar parts should supplement or support the center piece or focal center. This theory holds that these jewelry structures are not art. They should function like a frame to a painting, or a pedestal to a sculpture.
It is, however, often difficult to separate the jewelry's anatomy like this, with one part important and the other parts supplemental. This BezelWorks Pendant project is, in part, designed to foster ideas, discussion and debate about the roles of fringe, edge, strap, bail and surface embellishment. Each of these is critical to the finished piece.
For each of these anatomical parts or extensions to our piece of jewelry, we need to understand it in terms of:
- What it is, its purpose, its role
- What value it has to the piece
- How it makes the piece more or less satisfying
- What principles should regulate it
- Whether it is part of the art or not
Center Piece
The central project: A BezelWorks Pendant, with open-back peyote bezel. How do we go about designing an aesthetically pleasing, well-functioning, center piece? What functions does the center piece serve? How do we make choices about size, design, proportions, placement?
Edge, Frame, Boundary, Line
The Center Piece has a bezel, creating an interior edge encircling our stone. In addition, the we weave a frame around the entire Center Piece, creating an additional key edging component.
Edging is used to give a finished look to the piece. It might be used to hide threads. It might be used to hide any irregularities in how beads line up or are juxtaposed. An edging strategy is especially critical, however, for creating, preserving, blurring, or otherwise affecting the boundary line, line curvature, and/or silhouette of the center piece or the piece of jewelry as a whole.
What role does the “border” of a piece play? Does it mark a beginning/ending? How does it help the viewer appreciate the emotional content of the piece?
What kinds of positioning issues are associated with the placement on an edge, boundary, border or line?
Fringe and Surface Embellishment
We weave Fringe Embellishment off our Frame. So what exactly is fringe, and what can fringe be? How does the fringe make the piece more or less satisfying? There are numerous possibilities.
In good jewelry design, the Fringe and/or other Surface Embellishment would play either a supporting, or a co-equal role, with the center piece. It would not overwhelm or be overdone. It would seem as if the fringe were organic part of the piece. It would not seem like an afterthought. If it's primary purpose is to hide flaws, no one should notice. Too often, designers overdo the fringe.
Straps
The Center Piece hangs from a thin, twisted Ndebele tube Strap. What are the visual and functional purposes of the strap? What should the strap look like? How should the strap be connected to the piece? Where should the strap be connected to the piece? To what extent is or should the strap be as an integral part of the piece of jewelry as art? How does the strap define a silhouette? How does the strap make the piece more or less satisfying?
Bails
In our piece, a Bail is connected directly to the Center Piece, and the strap moves through it. A bail changes the visual and artistic relationship between the strap and the center piece. How might this be helpful, and how not? The bail poses similar design challenges as the strap -- size, proportion, placement and attachment. However, it has to succeed at one additional task -- it has to control the visual, aethestic and functional transitioning between the center piece and the strap.
The Canvas
We have two things which serve as "Canvas". The most obvious is the stringing material. In this project, we use beading thread for some parts, and a cable thread for others. The other part which serves as "Canvas" are the woven beads which for the basis of our Frame, and off of which we add Fringe.
The "canvas" in a piece of jewelry may be the stringing material, and how it is worked off of. It might be another piece of beadwork, such as a beaded base, off of which some center piece is developed. It might be a core line of beads. It might be a piece of fabric or other material. How does the canvas influence the interpretation of jewelry as art? How should the canvas interact with the main piece and its components? To what extent should it become part of the artwork itself; and to what extent, not? Classic Art theory suggests that the canvas should NOT be a part of the artwork at all.
What You Will Learn:
- Discussion of "Jewelry as Art" vs. "Jewelry as Craft" vs. "Jewelry as Design"
- Review of "Fringe" Theory, the Design Process, and Playing with a Variety of Applications
- Review of "Edge" or Boundary Theory, the Design Process, and Playing with a Variety of Applications
- Review of "Strap" Theory, the Design Process, and Playing with a Variety of Applications
- Review of "Bail" Theory, the Design Process, and Playing with a Variety of Applications
- Review of "Canvas" Theory, the Design Process, and Playing with a Variety of Applications
- Review of "Surface Embellishment" Theory, the Design Process, and Playing with a Variety of Applications
- Within the Framework of the Ideas Discussed, Creating a Pendant Center Piece, using tubular and circular peyote, a peyote bail, and a strap using spiral tubular Ndebele
TABLE OF CONTENTS
SUPPLIES LIST, p. 4 I.
Planning Your Project, p. 6
THE CENTERPIECE, p. 6
EDGE, p. 7
FRINGE AND SURFACE EMBELLISHMENT, p. 7
STRAPS, p.7
BAILS, p. 7
THE CANVAS, p. 7
IA. Conceptualizing Your Piece, p. 8
IB. Measurements, p. 9
IC. Selecting Materials, p. 10
ID. Sketching a Pattern or Graph, p. 11
IE. Identifying Potential Areas of Weakness within Your Piece, p. 14
IF. Visualizing Your Process, p. 15
IG. Organizing Your Work Space, p .16
II. Beginning Your Project, p. 17
IIA. Basic Steps, p. 17
A. BEZEL: Create an even count, tubular peyote, open back bezel around a gemstone, p. 18
B. FRAME: Above the foundation row of the bezel, create a circular peyote frame, p. 27
C. FRINGE SURFACE EMBELLISHMENT: Embellish the front surface of the frame all the way around, p. 30
D. STRAP: Using twist-tubular Ndebele, make a 16" long strap, and attach a hook and eye clasp and extender chain, p.33
E. BAIL: Using circular peyote, create a diamond shape bail which bends over at the diagonal, forming a triangle, p. 38
F. ATTACH SUPPORT: Stitch an 8/0 to the top and back of the bezel, and attach the bail to the 8/0, p. 42
IIB. Dealing with Contingencies, p. 46 IIC. Finishing Touches, p. 47
III. Summary of Learning Objectives You Have Met After Accomplishing This Project, p. 48
IV. Next Steps, p. 51 IVA. Suggested Readings, p. 51
| LEARNING OBJECTIVES | BEZELWORKS PENDANT, FRINGE, EDGING, BAIL and STRAP | ||
|
| BEGINNER | INTERMEDIATE | ADVANCED |
| TECHNICAL MECHANICS | |||
| 1. Managing Thread Tension |
| INTERMEDIATE |
|
| 2. Holding Your Piece To Work It | INTERMEDIATE |
| |
| 3. Reading Simple Pattern, Figure and/or Graph |
| INTERMEDIATE |
|
| 4. Selecting Materials |
| INTERMEDIATE |
|
| 5. Identifying Areas of Potential Weakness, and | INTERMEDIATE |
| |
| 6. Determining Measurements, including Width and Length of a Piece, Especially In Relationship To Bead Sizes | BEGINNER |
|
|
| 7. Finishing Off Threads in Piece or Extending by Adding Threads | BEGINNER |
|
|
|
| |||
|
| |||
| UNDERSTANDING CRAFT BASIS OF STITCH | |||
| 1. Starting the Stitch |
| INTERMEDIATE |
|
| 2. Implementing the Basic Stitch | INTERMEDIATE |
| |
| 3. Finishing Off Your Piece With A Clasp Assembly | BEGINNER |
|
|
| 4. Creating Simple Surface Embellishment |
| INTERMEDIATE |
|
| 5. Creating a Simple Edging or Fringe |
| INTERMEDIATE |
|
| 6. Working Stitch in Flat Form | BEGINNER |
|
|
| 7. Increasing and Decreasing | INTERMEDIATE |
| |
| 8. Working Stitch in Tubular Form | BEGINNER |
|
|
| 9. Working Stitch To Create Open (Negative Spaces), and Split Forms |
|
| |
| 10. Elaborately Embellishing the Stitch, including Fringes, Edge Treatments, Bails, Straps and Connectors |
| INTERMEDIATE |
|
| 11. Working Stitch in Circular Form | BEGINNER |
|
|
| 12. Working Stitch in Spiral Form | BEGINNER |
|
|
| 13. Working Stitch in Diagonal Form |
|
|
|
| 14. Working Stitch in 3-Dimensions (sculptural) |
|
|
|
|
| |||
|
| |||
| UNDERSTANDING ART & DESIGN BASIS OF STITCH | |||
| 1. Learning Implications When Choosing Different Sizes/Shapes of Beads, or Using Different Stringing Materials | INTERMEDIATE |
| |
| 2. Understanding Relationship of this Stitch in Comparison to Other Types of Bead Weaving Stitches | BEGINNER |
|
|
| 3. Understanding How Bead Asserts Its Need For Color, Using This Stitch |
| INTERMEDIATE |
|
| 4. Creating Your Own Design with This Stitch, in Reference to Design Elements and Jewelry Design Principles of Composition |
| ADVANCED | |
| 5. Creating Shapes, Components and Forms with This Stitch, and Establishing Themes |
| INTERMEDIATE |
|
| 6. Building in Structural Supports, and Other Support Elements, into the Design |
| INTERMEDIATE |
|
|
| |||
|
| |||
| BECOMING BEAD WEAVING ARTIST | |||
| 1. Developing A Personal Style | BEGINNER |
|
|
| 2. Valuing or Pricing Your Work |
|
|
|
| 3. Teaching Others The Stitch |
|
|
|
| 4. Promoting Yourself and Your Work |
|
|
|
| 5. Advocating for Jewelry as "Art" and as "Design" |
|
|
|
|
| |||
By completing
 Loading... Please wait...