Loading... Please wait...
 Categories
Categories
HAPUA REEF CUFF KIT, (1 unit)

, $94.99 (https://landofodds.com/hapua-reef-cuff-kit-1-unit/))

Product Description
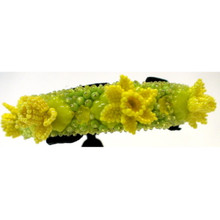
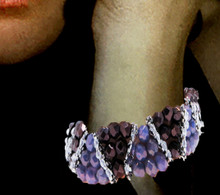
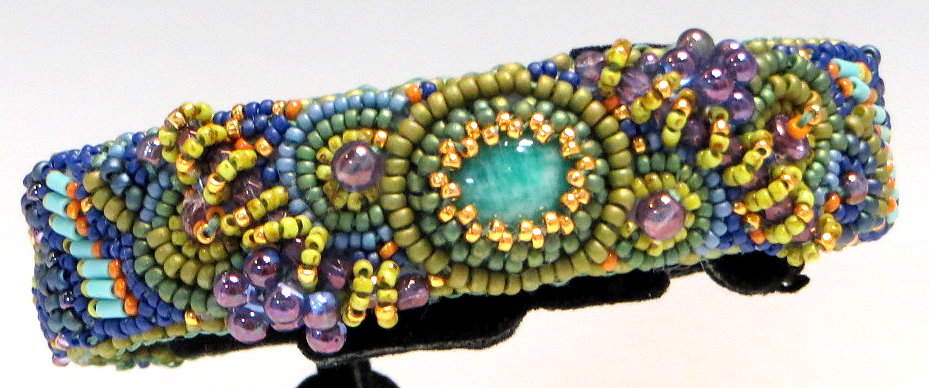
Hapua Reef Cuff
Designed by: Warren Feld
BW1-SOM-10
ADVANCED BEGINNER LEVEL
-- Bead Weaving Sequence
-- Stitch of the Month
-- Lesson: Bead Embroidery
-- Bracelet
Capture the romance of the shallow waters along a tropical lagoon beach! Learn several simple bead embroidery techniques for expressing the artistry of it all.
NOTE: Regular retail and wholesale store discounts do not apply to kits.
The HAPUA REEF CUFF KIT
Instructions to make a 7" cuff bracelet
with or without a brass cuff form
(Supplies to make up to an 8" bangle bracelet,
but without using a brass cuff form )
|
PLEASE NOTE: Sometimes, because of erratic supplies of beads and othermaterials,
we will need to substitute something of similar color and quality.
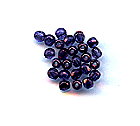
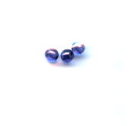
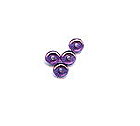
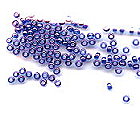
#1 AMAZONITE PALETTE
|

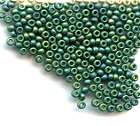
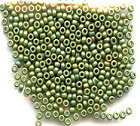

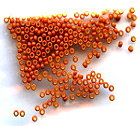

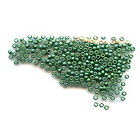
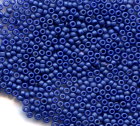


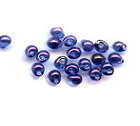
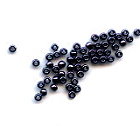
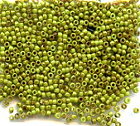
Colors may appear differently on different monitors.
FORMAT OPTONS
(1) KIT with Instructions on CD
(2) CD Instructions Only
About the Kit...
Bead Embroidery has been used to embellish and decorate clothing since the dawn of civilization. In both Russia and China, remains have been found of bead embroidery dating back thousands of years. In more recent history, bead embroidery has been used to decorate religious items, formal attire, and household objects.
Bead Embroidery is such a versatile stitch that all beads are game! If you were working on a large wall-hanging, larger beads would be appropriate.
Conversely, if you were working on a necklace or bracelet, you would want to use beads that are proportionate to your project. Within those guidelines, any type of bead (bugle, seed, delica, drop, etc.) would enhance the dimensionality and texture of your piece.
We create a canvas, decide how to give form to this canvas, plan a design, and embroider that design onto our formed-canvas. The challenge is always to achieve a contemporary, artistic look to your piece -- one that has a sense of movement, dimensionality, a use of materials that makes the ordinary 'noteworthy', and good technique.
In this piece, I wanted to re-create the colors, patterns and lines of the beautiful forms, waves and materials along the shoreline of a tropical lagoon and the underlying reef in the Caribbean. I especially liked looking through the shallow water where it met the beach at a particularly secluded part of the lagoon.
I also wanted to create an embroidery plan that allows the student to learn several different embroidery-patterning techniques within the composition as a whole.
In the Hapua Reef Cuff project...
LearnToBead Goals:
- Basics of Bead Embroidery, including
--- Preparing a brass cuff form, finishing the inner and outer surfaces with ultra-suede and Lacy’s Stiff Stuff foundation
--- Drawing a template and setting up a design plan for your piece
--- Attaching beads to the foundation, using various methods, including back stitch, couching, bezeling a stone, placing beads linearly and curvalinearly, crowding, cross-hatch, and fringe-style embellishment
--- Adding an edging around your piece
TABLE OF CONTENTS
This set of instructions is organized as a series of
Jewelry Design Choices:
SUPPLIES LIST, p. 3
I. Planning Your Project, p. 5
IA. Conceptualizing Your Piece, p. 6
IB. Measurements, p. 7
MAKING A LARGER SIZED BRACELETIC. Selecting Materials, p. 8
IC. Selecting Materials, p. 8
ID. Sketching a Pattern or Graph, p. 9
IE. Identifying Potential Areas of Weakness within Your Piece, p. 10
IF. Support Systems, p. 10
IG. Visualizing Your Process, p. 10
IH. Organizing Your Work Space, p. 11
II. Beginning Your Project, p. 12
IIA. Basic Steps, p. 12
STEP 1: CREATE TEMPLATE AND FOUNDATION, p. 13
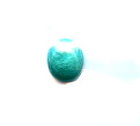
STEP 2: BEZEL AROUND CENTRAL STONE, p.14
STEP 3: PREPARE THE CUFF BLANK WITH ULTRA SUEDE, p. 18
STEP 4: EMBROIDER A CIRCLE AROUND OUR BEZELED STONE USING BACK STITCH, p. 19
WORK ON RIGHT SIDE FIRST
STEP 5: EMBROIDER SCALLOP PATTERN AROUND LARGER BEAD USING BACK STITCH, p. 20
STEP 6: LAY A LINE OF BEADS USING COUCHING, p. 22
STEP 7: APPLY “OVER THE FENCE” TECHNIQUE, p. 24
STEP 8: ADD 2 MORE SCALLOP PATTERNS, ONE AROUND A FRINGED CENTER, p. 25
STEP 9: CROWD A GROUPING OF DROPS USING BACK STITCH, p. 27
STEP 10: LAY DOWN A BUGLE WALKWAY USING BACK STITCH, p. 28
STEP 11: ADD 3 PARTIAL SCALLOPED SEMI-CIRCLES USING BACK STITCH, p. 30
STEP 12: FINISH OFF WITH CROSS-HATCH PATTERN USING BACK STITCH, p. 31
REPEAT STEPS 5-12 ON LEFT SIDE
STEP 13: EXAMINE BEADWORK, AND CORRECT FOR ANY LOOSE BEADS, OR UNDESIRABLE OPEN SPACES, p. 33
STEP 14: CUT OUT EMBROIDERED FOUNDATION, p. 34
STEP 15: GLUE OVER TOP OF CUFF FORM AND LET SET 20 MINUTES, p. 34
STEP 16: ADD SIMPLE BRICK STITCH STYLE EDGING AROUND ALL 4 SIDES OF CUFF, p. 35
IIB. Dealing with Contingencies, p. 37
IIC. Finishing Touches, p. 38
III. Summary of Learning Objectives You Have Met
After Accomplishing This Project, p. 39
IV. Next Steps, p. 41
IVA. Suggested Readings, p. 41
|
LEARNING OBJECTIVES |
HAPUA REEF BRACELET |
||
|
|
BEGINNER |
INTERMEDIATE |
ADVANCED |
|
TECHNICAL MECHANICS |
|||
|
1. Managing Thread Tension |
BEGINNER |
|
|
|
2. Holding Your Piece To Work It |
BEGINNER |
|
|
|
3. Reading Simple Pattern, Figure and/or Graph |
BEGINNER |
|
|
|
4. Selecting Materials |
BEGINNER |
|
|
|
5. Identifying Areas of Potential Weakness, and |
BEGINNER |
|
|
|
6. Determining Measurements, including |
BEGINNER |
|
|
|
7. Finishing Off Threads in Piece or Adding Threads |
BEGINNER |
|
|
|
|
|||
|
|
|||
|
UNDERSTANDING CRAFT BASIS OF STITCH |
|||
|
1. Starting the Stitch |
|
|
|
|
2. Implementing the Basic Stitch |
BEGINNER |
|
|
|
3. Finishing Off Your Piece With A Clasp Assembly |
|
|
|
|
4. Creating Simple Surface Embellishment |
|
INTERMEDIATE |
|
|
5. Increasing and Decreasing |
|
|
|
|
6. Working Stitch in Tubular Form |
BEGINNER |
|
|
|
7. Working Stitch To Create Open (Negative Spaces), and Split Forms |
|
|
|
|
8. Elaborately Embellishing the Stitch, |
BEGINNER |
|
|
|
9. Working Stitch in Circular Form |
|
|
|
|
10. Working Stitch in 3-Dimensions |
BEGINNER |
|
|
|
|
|||
|
|
|||
|
UNDERSTANDING ART & DESIGN BASIS OF STITCH |
|||
|
1. Learning Implications When Choosing Different |
BEGINNER |
|
|
|
2. Understanding Relationship of this Stitch in Comparison |
BEGINNER |
|
|
|
3. Understanding How Bead Asserts Its Need For Color, |
BEGINNER |
|
|
|
4. Creating Your Own Design with This Stitch, in |
|
|
|
|
5. Creating Shapes, Components and Forms with |
BEGINNER |
|
|
|
|
|||
|
|
|||
|
BECOMING BEAD WEAVING ARTIST |
|||
|
1. Developing A Personal Style |
|
|
|
|
2. Valuing or Pricing Your Work |
|
|
|
|
3. Teaching Others The Stitch |
|
|
|
|
|
|||
By completing a purchase of any of our kits and/or instructions, you agree to our terms and conditions:
1. Customers are allowed to make 3 copies of instructions for personal use
2. Permission is required from LandOfOdds.com, Be Dazzled Beads, or LearnToBead.net, when teaching for fees, with any of our projects