Loading... Please wait...
 Categories
Categories
- Home
- KITS
- BEAD WEAVING
- DAFFODIL CUFF KIT (1 unit)
DAFFODIL CUFF KIT (1 unit)

, $67.99 (https://landofodds.com/daffodil-cuff-kit-1-unit/))

Product Description
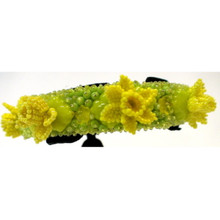
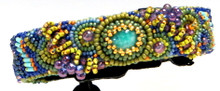
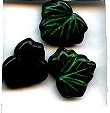
Daffodil Cuff Bracelet
Designer: Kathleen Lynam
BW2-EMB-01
INTERMEDIATE LEVEL
-- Bead Weaving Sequence
-- Lesson: Bead Embroidery, Brick Stitch 3-D Flower
-- Bracelet
A spring time garden cuff! A simple bead embroidered base highlights delicate daffodils woven with brick and ladder stitches.
NOTE: Regular retail and wholesale store discounts do not apply to kits.
The DAFFODIL CUFF BRACELET KIT
Instructions to make a cuff bracelet for a 6 1/2" - 7" wrist
|
PLEASE NOTE: Sometimes, because of erratic supplies of beads and othermaterials,
we will need to substitute something of similar color and quality.
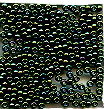
#1 MORNING FIELDS
|

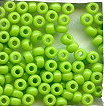
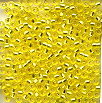


Colors may appear differently on different monitors.
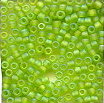
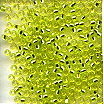
#2 AFTERNOON FORESTS
|

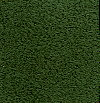
Colors may appear differently on different monitors.
FORMAT OPTONS
(1) KIT with Instructions on CD
(2) CD Instructions Only
About the Kit...
I love flowers! The challenge for me in this piece was to construct a tiny flower using one thread.
Bead Embroidery has been used to embellish and decorate clothing since the dawn of civilization. In both Russia and China, remains have been found of bead embroidery dating back thousands of years. In more recent history, bead embroidery has been used to decorate religious items, formal attire, and household objects.
Bead Embroidery is such a versatile stitch that all beads are game! If you were working on a large wallhanging, larger beads would be appropriate. Conversely, if you were working on a necklace orbracelet, youwould want to use beades that are proportionate to your project. Within those guidelines, any type of bead (bugle, seed, delica, drop, etc.) would enhance the dimensionality and texture of your piece.
We create a canvas, decide how to give form to this canvas, plan a design, and embroider that design onto our formed-canvas. The challenge is always to achieve a contemporary, artistic look to your piece -- one that has a sense of movement, dimensionality, a use of materials that makes the ordinary 'noteworthy', and good technique.
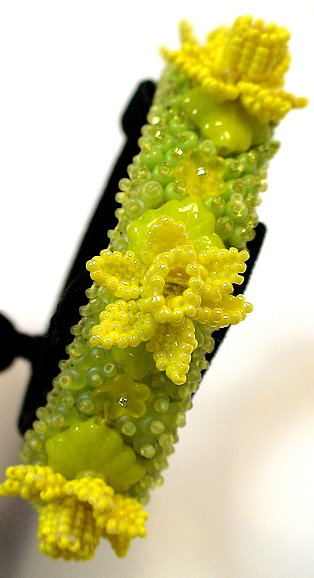
In this piece, I wanted to create a garden of daffodils. The challenge for me was to create 3-dimensional flowers using brick stitch, and how to smartly incoporate these within my formed canvas, that is my cuff bracelet.
In the Daffodil Cuff Bracelet project...
LearnToBead Goals:
- Basics of Bead Embroidery, including
--- Preparing a brass cuff form, finishing the inner and outer surfaces with ultra suede and stiff felt
--- Drawing a template and setting up a design plan for your piece
--- Attaching beads to the felt, using various methods, including back stitch, and fringe-style embellishment
--- Adding a picot edge around your piece
--- Stiffening bead-woven beadwork with acrylic floor wax
--- Using textile paints to cover any felt-foundation areas peeking through
- Creating a 3-dimensional, brick-stitched daffodil flower
Prerequisites:
CONTENTS:
SUPPLIES LIST, p. 3
I. Planning Your Project, p. 5
IA. Conceptualizing Your Piece, p. 5
IB. Measurements, p. 7
IC. Selecting Materials, p. 7
ID. Sketching a Pattern or Graph, p. 8
IE. Identifying Potential Areas of Weakness within Your Piece, p. 8
IF. Visualizing Your Process, p. 9
IG. Organizing Your Work Space, p. 10
II. Beginning Your Project, p. 10
IIA. Basic Steps, p. 10
A1. PREPARING THE CUFF BLANK WITH ULTRA SUEDE, p. 11
A2. CREATING THE STIFF FELT FOUNDATION, p. 14
A3. PLANNING YOUR DESIGN, p. 14
A4. MAKING THE BRICK-STITCH 3-D DAFFODILS, p. 15
A5. EMBELLISH AND ASSEMBLE, p. 21
A6. ADD A PICOT EDGE, p. 25
A7. FINISHING TOUCHES / MAKE IT PRETTY, p. 26
IIB. Dealing with Contingencies, p. 27
IIC. Finishing Touches, p. 27
III. Summary of Learning Objectives You Have Met
After Accomplishing This Project, p. 28
IV. Next Steps, p. 30
IVA. Suggested Readings, p. 30
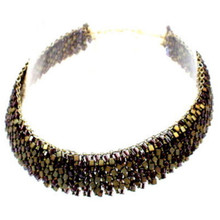
This bracelet involves creating a netted base, and then adding a second layer of netting as embellishment. I envisioned a bracelet with a lot of textural and color variation embellishment on the surface, to give the feel of a cobblestone walkway. Since I wanted the clasp to look like it was an organic extension of my cobblestone walkway, I decided to make the clasp, in part, using the Netting Stitch. The Netted bracelet is very fluid, and easy to wear. It is a casual piece.
| LEARNING OBJECTIVES | DAFFODIL CUFF BRACELET BW2-EMB-01 | ||
| BEGINNER | INTERMEDIATE | ADVANCED | |
| TECHNICAL MECHANICS | |||
| 1. Managing Thread Tension | BEGINNER | ||
| 2. Holding Your Piece To Work It | INTERMEDIATE | ||
| 3. Reading Simple Pattern, Figure and/or Graph | BEGINNER | ||
| 4. Selecting Materials | BEGINNER | ||
| 5. Identifying Areas of Potential Weakness, and Strategies for Dealing With These | BEGINNER | ||
| 6. Determining Measurements, including Width and Length of a Piece, Especially In Relationship To Bead Sizes | INTERMEDIATE | ||
| 7. Finishing Off Threads in Piece or Adding Threads | BEGINNER | ||
| UNDERSTANDING CRAFT BASIS OF STITCH | |||
| 1. Starting the Stitch | INTERMEDIATE | ||
| 2. Implementing the Basic Stitch | INTERMEDIATE | ||
| 3. Finishing Off Your Piece With A Clasp Assembly | |||
| 4. Creating Simple Surface Embellishment | INTERMEDIATE | ||
| 5. Increasing and Decreasing | BEGINNER | ||
| 6. Working Stitch in Tubular Form | |||
| 7. Working Stitch To Create Open (Negative Spaces), and Split Forms | BEGINNER | ||
| 8. Elaborately Embellishing the Stitch, including Fringes, Edge Treatments, Straps and Connectors | INTERMEDIATE | ||
| 9. Working Stitch in Circular Form | |||
| 10. Working Stitch in 3-Dimensions | INTERMEDIATE | ||
| UNDERSTANDING ART & DESIGN BASIS OF STITCH | |||
| 1. Learning Implications When Choosing Different Sizes/Shapes of Beads, or Using Different Stringing Materials | BEGINNER | ||
| 2. Understanding Relationship of this Stitch in Comparision to Other Types of Bead Weaving Stitches |
Product ReviewsFind Similar Products by CategoryRelated Products | ||