Categories
Categories
ETRUSCAN VINE NECKLACE INSTRUCTIONS DOWNLOAD, (1 unit)
Product Description
ETRUSCAN VINE NECKLACE
Designer: Warren Feld
BW2-NT-01
INTERMEDIATE LEVEL
-- Bead Weaving Sequence
-- Lesson: Mixing Techniques; Netting; Bead Stringing
-- Necklace
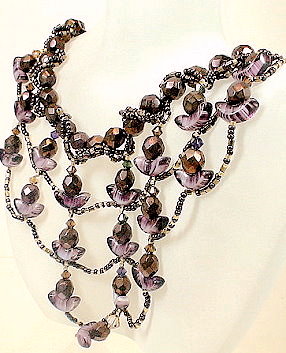
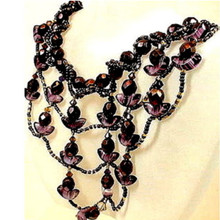
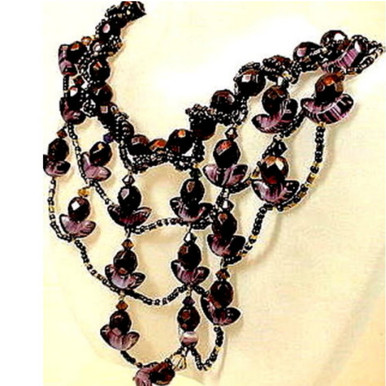
Impress with this Tuscany-inspired necklace! Combine Bead Stringing and Netting techniques to make this fun, classy piece.
NOTE: Regular retail and wholesale store discounts do not apply to kits.
The ETRUSCAN VINE NECKLACE KIT
Instructions to make a 15 - 17 1/2 " necklace
Supplies to make up to an 18 1/2" necklace
|
PLEASE NOTE: Sometimes, because of erratic supplies of beads and othermaterials,
we will need to substitute something of similar color and quality.
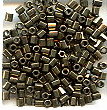
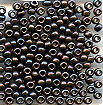
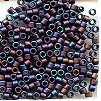
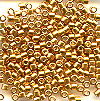
#1 PURPLE WINE PALETTE
|
Colors may appear differently on different monitors.
FORMAT OPTONS
(1) Instructions Digital Download
About the Kit...
In the Etruscan Vine Necklace, I combine some bead stringing with some bead-woven netting techniques.
Bead stringing involves sliding beads on a stringing material, adding pendant drops as a design element, and finishing off the piece by attaching a clasp assembly.
Netting (bead weaving) is one of the oldest forms of beadwork. It is done with needle and thread. It involves adding three or more beads, one or more of which are joined to the previous row, and creates an open space.
This Etruscan Vine Necklace consists of a cascading series of pendant drops moving outward from a simple choker strand and captured within a broad netted grid.
The trick for combining bead stringing and bead weaving techniques is to create “jumping off points” from the bead strung piece, off of which to beadweave.
The beads used include Czech glass angel wings and fire polish beads, Austrian crystal bicone beads (Series 5301), gold filled beads, and Japanese Miyuki glass seed beads and delica beads, including some 24KT delica beads. The piece is strung on FireLine. The necklace is meant to be worn as a choker, and has an adjustable hook and eye clasp, allowing the length to vary between 15" and 17 1/2".
In the Etruscan Vine Necklace project...
LearnToBead Goals:
- Discuss concerns, issues and strategies when mixing techniques
- Create a design-plan for a bead strung/bead woven necklace
- Prepare a strung row of beads so that we can bead-weave off of it
- Measure a drop-down necklace so that it sits correctly around the neck and upon the chest
- Attach a choker clasp assembly
TABLE OF CONTENTS
Supplies, p. 3
I. Planning Your Project, p. 5
IA. Conceptualizing Your Piece, p. 5
IB. Measurements, p. 9
IC. Selecting Materials, p. 10
ID. Sketching a Pattern or Graph, p. 11
IE. Identifying Potential Areas of Weakness within Your Piece, p. 16
IF. Visualizing Your Process, p. 16
IG. Organizing Your Work Space, p. 17
II. Beginning Your Project, p. 18
IIA. Basic Steps, p. 18
A. Attach the left side of the clasp assembly, p. 18
B. Create the Bead-Strand, with jumping off points, p.19
C. Attach the right side of the clasp assembly, p. 20
D. Finish bead stringing tasks, p. 20
E. Add the wrap around vine, p. 21
F. Create Captured Bead-Drop Row 1, p. 25
G. Create Captured Bead-Drop Row 2, p. 29
H. Create Captured Bead-Drop Row 3, p. 29
I. Add final Bead-Drop, p. 30 J. Add length of gold-filled chain, p. 31
IIB. Dealing with Contingencies, p. 31 IIC. Finishing Touches, p. 32
III. Summary of Learning Objectives You Have Met After Accomplishing This Project, p.32
IV. Next Steps, p. 34 IVA. Suggested Readings, p. 34
This Etruscan Vine Necklace pattern was influenced by pottery and jewelry designs from the Tuscany region of Italy around 300 B.C. through 500 A.D. In this fun project, we learn how to prepare a bead-strung row of beads so that we may bead-weave off it with beautiful and elegant netting. We discuss concerns and issues involved with mixing techniques, as well as some strategic Do's and Don'ts.
| LEARNING OBJECTIVES | ETRUSCAN VINE NECKLACE | ||
| BEGINNER | INTERMEDIATE | ADVANCED | |
| TECHNICAL MECHANICS | |||
| 1. Managing Thread Tension | BEGINNER | ||
| 2. Holding Your Piece To Work It | BEGINNER | ||
| 3. Reading Simple Pattern, Figure and/or Graph | BEGINNER | ||
| 4. Selecting Materials | BEGINNER | ||
| 5. Identifying Areas of Potential Weakness, and Strategies for Dealing With These | BEGINNER | ||
| 6. Determining Measurements, including Width and Length of a Piece, Especially In Relationship To Bead Sizes | INTERMEDIATE | ||
| 7. Finishing Off Threads in Piece or Adding Threads | BEGINNER | ||
| UNDERSTANDING CRAFT BASIS OF STITCH | |||
| 1. Starting the Stitch | BEGINNER | ||
| 2. Implementing the Basic Stitch | BEGINNER | ||
| 3. Finishing Off Your Piece With A Clasp Assembly | BEGINNER | ||
| 4. Creating Simple Surface Embellishment | |||
| 5. Increasing and Decreasing | |||
| 6. Working Stitch in Tubular Form | |||
| 7. Working Stitch To Create Open (Negative Spaces), and Split Forms | BEGINNER | ||
| 8. Elaborately Embellishing the Stitch, including Fringes, Edge Treatments, Straps and Connectors | |||
| 9. Working Stitch in Circular Form | |||
| 10. Working Stitch in 3-Dimensions | |||
| UNDERSTANDING ART & DESIGN BASIS OF STITCH | |||
| 1. Learning Implications When Choosing Different Sizes/Shapes of Beads, or Using Different Stringing Materials | BEGINNER | ||
| 2. Understanding Relationship of this Stitch in Comparision to Other Types of Bead Weaving/Bead Stringing Stitches | BEGINNER | ||
| 3. Understanding How Bead Asserts Its Need For Color, Using This Stitch | |||
| 4. Creating Your Own Design with This Stitch, in Reference to Jewelry Design Principles of Composition | |||
| 5. Creating Shapes, Components and Forms with This Stitch, and Establishing Themes | |||
| BECOMING BEAD WEAVING ARTIST | |||
| 1. Developing A Personal Style | |||
| 2. Valuing or Pricing Your Work | |||
| 3. Teaching Others The Stitch | |||
By completing a purchase of any of our kits and/or instructions, you agree to our terms and conditions:
1. Customers are allowed to make 3 copies of instructions for personal use
2. Permission is required from LandOfOdds.com, Be Dazzled Beads, or LearnToBead.net, when teaching for fees, with any of our projects
 Loading... Please wait...


 dd
dd
