Categories
Categories
ETRUSCAN SQUARE STITCH BRACELET INSTRUCTIONS DOWNLOAD, (1 unit)
Product Description
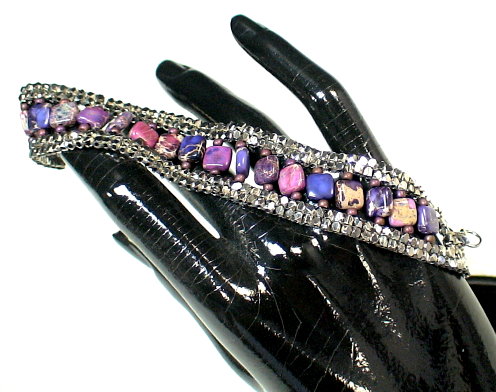
ETRUSCAN SQUARE STITCH BRACELET
Designer: Warren Feld
BW2-SQ-01
INTERMEDIATE LEVEL
-- Bead Weaving Sequence
-- Lesson: Square Stitch, Negative Spaces, Frames and Boundaries
-- Bracelet
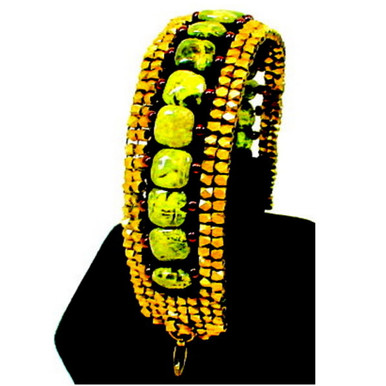
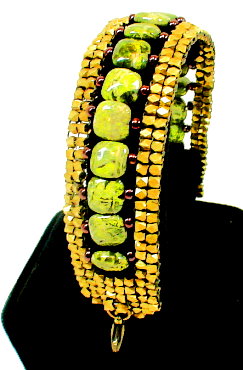
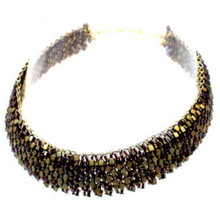
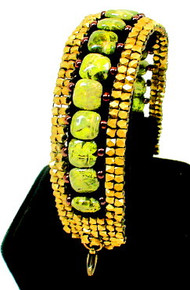
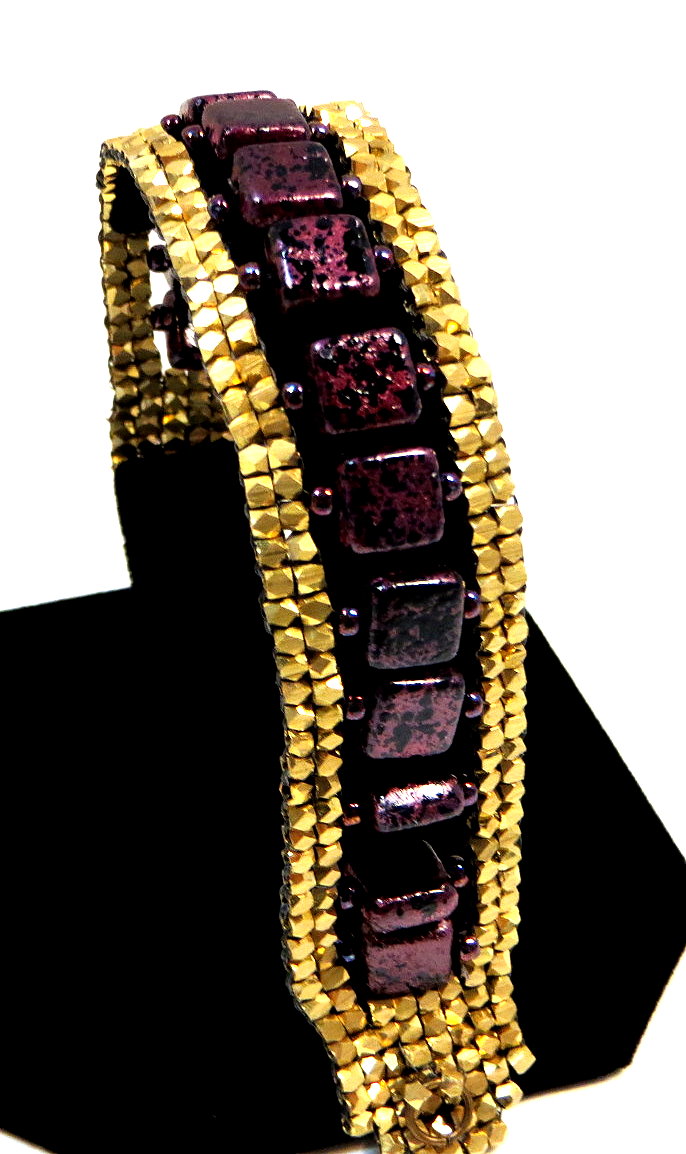
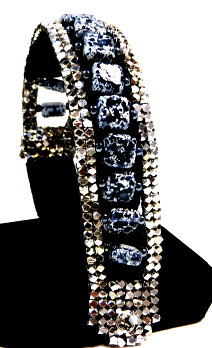
Wear your inner Etruscan metalsmith! Design a Square-Stitched frame of faceted metal beads surrounding a rich vein of gemstone squares.
NOTE: Regular retail and wholesale store discounts do not apply to kits.
The ETRUSCAN SQUARE STITCH BRACELET KIT
Instructions to make a 7" bracelet
Supplies to make up to an 8 1/2" bracelet
|
PLEASE NOTE: Sometimes, because of erratic supplies of beads and other materials, we will need to substitute something of similar color and quality.
#1 BRASS w/GREEN or OLIVE
| ||||||||||
Colors may appear differently on different monitors.
#1 BRASS w/BURGUNDY
#2 NICKEL w/PURPLE
| ||||||||||
Colors may appear differently on different monitors.
#2 NICKEL w/BLACK AND WHITE
FORMAT OPTONS
(1) Instructions Digital Download
About the Kit...
This is a fun bracelet project, using the square stitch. This general design – square stitch with an open window – has appeared in many variations over the years, including one variation developed by Shelley Nybakke. This Etruscan Square Stitch Bracelet is influenced by Shelley’s version of the piece, particularly in the choice of the 3mm faceted brass cube beads.
The Square Stitch is a very basic stitch. The beads line up along a grid of parallel rows and perpendicular columns, where each square represents one bead. The Square Stitch can utilize patterns developed for Cross Stitch, Loom, or Knitting patterns.
Design Elements Discussed: boundaries, frames, negative spaces, shapes, textures.
In this example, I created a 7” bracelet for a woman to wear. The beadwork was 6 ½” and the clasp assembly added another ½”. The bracelet was 8 – 3mm size beads wide (about 7/8”), and 67 – 3mm size beads long.
My frame-borders around the window were each 2 – 3mm beads wide. My window (negative space) was the equivalent of 4 – 3mm beads wide.
I wanted to have my frame constructed of one type of faceted bead, and to create a simple pattern of larger square beads along the window space. I always like to bracket or frame my focal beads, so I put an 8/0 seed bead on either side of my focal square beads.
I imagined that my bracelet could be worn casually, as well as a “little dressed up,” which is why I chose to use the metal and gemstone beads on the piece.
In the Etruscan Square Stitch Bracelet project...
LearnToBead.net Goals:
- Planning a bracelet design with a negative space
- Translating bracelet measurement goals into the construction plan
- Understanding construction and structural issues, such as areas of weakness, using the Square Stitch with this design
- Discussion of Design Concepts: boundaries, frames, negatives spaces, shapes and textures
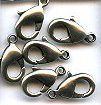
- Adding a clasp assembly
TABLE OF CONTENTS
SUPPLIES LIST, p. 3 I.
Planning Your Project, p. 4
BOUNDARIES, FRAMES, NEGATIVE SPACES, p. 4
IA. Conceptualizing Your Piece, p. 5
IB. Measurements, p. 6
IC. Selecting Materials, p. 7
ID. Sketching a Pattern or Graph, p. 8
IE. Identifying Potential Areas of Weakness within Your Piece, p. 8
IF. Visualizing Your Process, p. 9 IG. Organizing Your Work Space, p. 10
II. Beginning Your Project, p. 11
IIA. Basic Steps, p. 11
1. Make Frame, p. 11
2. Make Decreased Ends, p. 16
3. Add Inside Window Beads, p. 17
4. Add Clasp Assembly, p. 19
IIB. Dealing with Contingencies, p. 21
IIC. Finishing Touches, p. 21
III. Summary of Learning Objectives You Have Met After Accomplishing This Project, p. 22
IV. Next Steps, p. 25
IVA. Suggested Readings, p. 25
In this bracelet project, we play with design issues associated with negative (open)spaces, boundaries, frames, shapes and textures. We plan our design-layout using faceted brass beads and the square stitch.
| LEARNING OBJECTIVES | ETRUSCAN SQUARE STITCH BRACELET | ||
|
| BEGINNER | INTERMEDIATE | ADVANCED |
| TECHNICAL MECHANICS | |||
| 1. Managing Thread Tension |
| INTERMEDIATE |
|
| 2. Holding Your Piece To Work It | BEGINNER |
|
|
| 3. Reading Simple Pattern, Figure and/or Graph |
| INTERMEDIATE |
|
| 4. Selecting Materials | BEGINNER |
| |
| 5. Identifying Areas of Potential Weakness, and | BEGINNER |
|
|
| 6. Determining Measurements, including Width and Length of a Piece, Especially In Relationship To Bead Sizes |
| INTERMEDIATE |
|
| 7. Finishing Off Threads in Piece or Extending by Adding Threads | BEGINNER |
|
|
|
| |||
|
| |||
| UNDERSTANDING CRAFT BASIS OF STITCH | |||
| 1. Starting the Stitch | BEGINNER |
|
|
| 2. Implementing the Basic Stitch | BEGINNER |
|
|
| 3. Finishing Off Your Piece With A Clasp Assembly | BEGINNER |
|
|
| 4. Creating Simple Surface Embellishment | BEGINNER |
| |
| 5. Creating a Simple Edging or Fringe |
|
| |
| 6. Working Stitch in Flat Form | BEGINNER |
|
|
| 7. Increasing and Decreasing | BEGINNER |
|
|
| 8. Working Stitch in Tubular Form |
|
|
|
| 9. Working Stitch To Create Open (Negative Spaces), and Split Forms | BEGINNER |
|
|
| 10. Elaborately Embellishing the Stitch, including Fringes, Edge Treatments, Bails, Straps and Connectors |
|
| |
| 11. Working Stitch in Circular Form |
|
|
|
| 12. Working Stitch in Spiral Form |
|
|
|
| 13. Working Stitch in Diagonal Form |
|
|
|
| 14. Working Stitch in 3-Dimensions (sculptural) |
|
|
|
|
| |||
|
| |||
| UNDERSTANDING ART & DESIGN BASIS OF STITCH | |||
| 1. Learning Implications When Choosing Different Sizes/Shapes of Beads, or Using Different Stringing Materials | BEGINNER |
|
|
| 2. Understanding Relationship of this Stitch in Comparison to Other Types of Bead Weaving Stitches |
|
| |
| 3. Understanding How Bead Asserts Its Need For Color, Using This Stitch |
|
| |
| 4. Creating Your Own Design with This Stitch, in Reference to Design Elements and Jewelry Design Principles of Composition |
|
|
|
| 5. Creating Shapes, Components and Forms with This Stitch, and Establishing Themes | BEGINNER |
|
|
| 6. Building in Structural Supports, and Other Support Elements, into the Design |
|
|
|
|
| |||
|
| |||
| BECOMING BEAD WEAVING ARTIST | |||
| 1. Developing A Personal Style |
|
|
|
| 2. Valuing or Pricing Your Work |
|
|
|
| 3. Teaching Others The Stitch |
|
|
|
| 4. Promoting Yourself and Your Work |
|
|
|
| 5. Advocating for Jewelry as "Art" and as "Design" |
|
|
|
|
| |||
By completing a purchase of any of our kits and/or instructions, you agree to our terms and conditions:
1. Customers are allowed to make 3 copies of instructions for personal use
2. Permission is required from LandOfOdds.com, Be Dazzled Beads, or LearnToBead.net, when teaching for fees, with any of our projects
 Loading... Please wait...